Clear paper jams
Occasionally, media becomes jammed during a job.
This section contains the following topics:
•
Clear paper jams
•
Avoid paper jams
Clear paper jams
Paper jams can occur either inside the printer or in the automatic document feeder.
CAUTION: To prevent possible damage to the printhead, clear paper jams as
soon as possible.
TIP: If you notice poor print quality, clean the printhead. For more information, see
Clean the printhead.
Use these steps to clear a paper jam.
To clear a jam inside the printer
1. Remove all media from the output tray.
CAUTION: Trying to clear a paper jam from the front of the printer can
damage the print mechanism. Always access and clear paper jams through the
rear access panel.
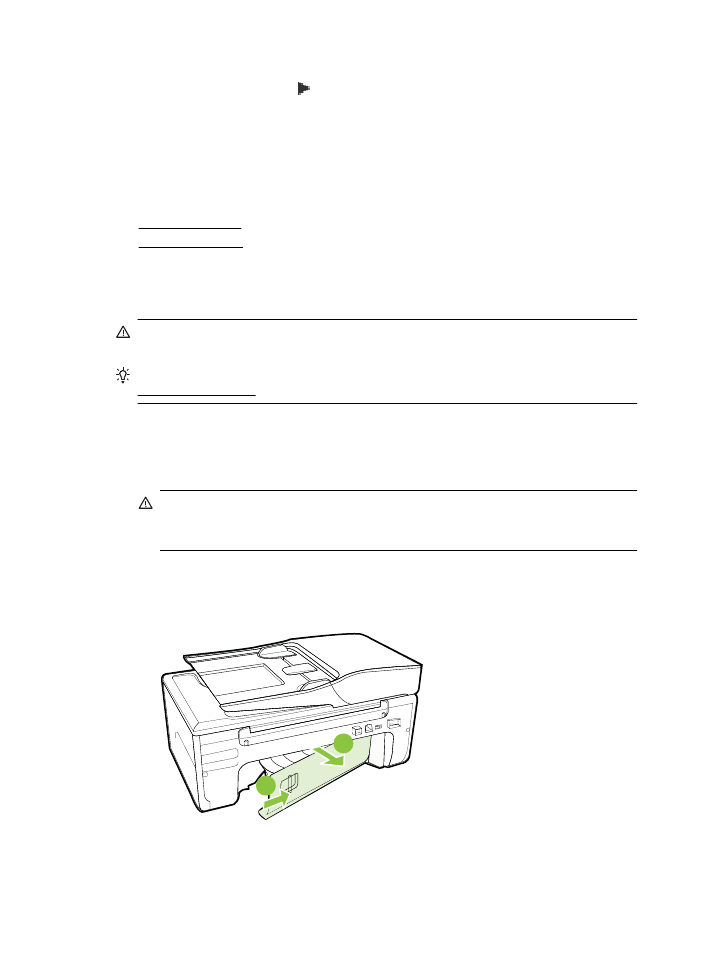
2. Check the rear access panel.
a. Push the left end of the rear access panel and slide to the right, and then pull
the rear access panel towards you.
1
2
Chapter 8
128
Solve a problem
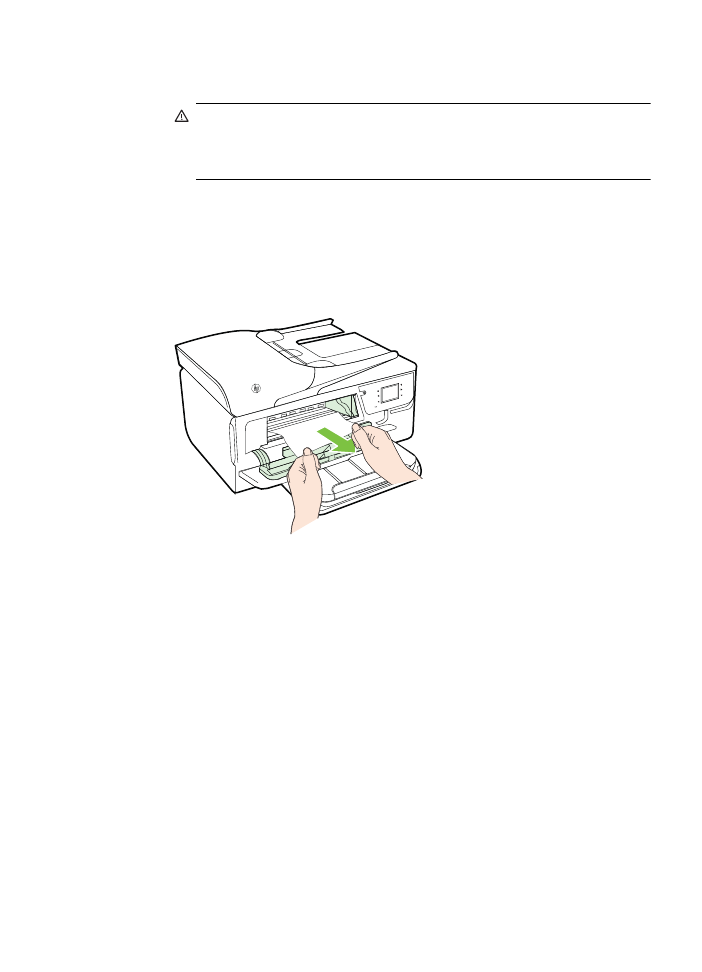
b. Locate any jammed media inside the printer, grasp it with both hands, and then
pull it towards you.
CAUTION: If the paper tears when you are removing it from the rollers,
check the rollers and wheels for torn pieces of paper that might be
remaining inside the printer. If you do not remove all the pieces of paper
from the printer, more paper jams are likely to occur.
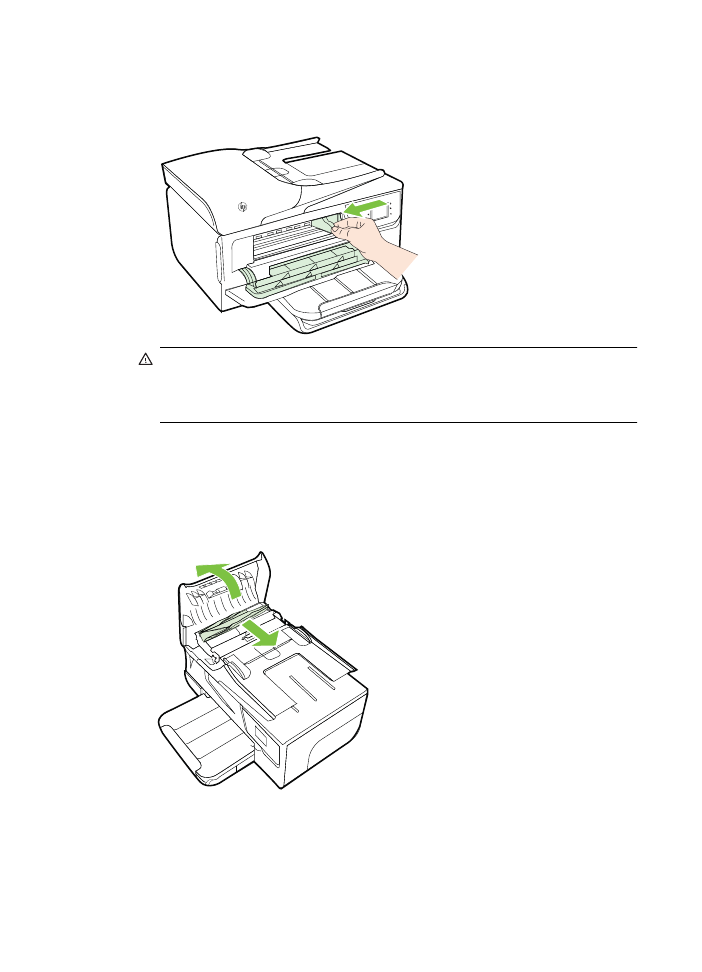
c. Replace the rear access panel until it snaps into place.
3. Check the front of the printer.
a. Open the ink cartridge access door.
b. If there is paper remaining inside the printer, ensure the carriage has moved to
the right of the printer, free any paper scraps or wrinkled media, and pull the
media towards you through the front of the printer.
Clear jams
129
c. Move the carriage to the left, locate any jammed media inside the printer on the
right side of the carriage, free any paper scraps or wrinkled media, and pull the
media towards you through the front of the printer.
WARNING! Do not reach into the printer when it is turned on and the carriage
is stuck. When you open the ink cartridge access door, the carriage should
return to its position on the right side of the printer. If it does not move to the
right, turn off the printer before you remove any jam.
4. After clearing the jam, close all covers, turn on the printer (if you turned it off) and
resend the print job.
To clear a paper jam in the automatic document feeder
1. Lift the cover of the automatic document feeder.
2. Lift the tab located on the front edge of the ADF.
Chapter 8
130
Solve a problem
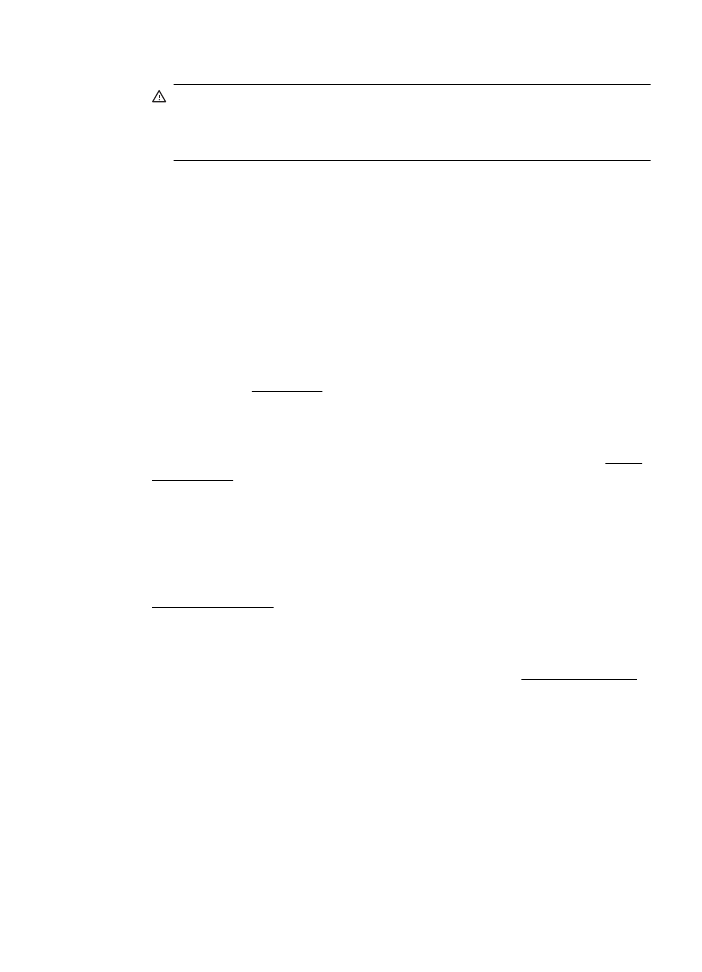
3. Gently pull the paper out of the rollers.
CAUTION: If the paper tears when you are removing it from the rollers, check
the rollers and wheels for torn pieces of paper that might remain inside the
printer. If you do not remove all the pieces of paper from the printer, more paper
jams are likely to occur.
4. Close the cover of the automatic document feeder, pressing down firmly until it
snaps into place.